
DIY Burlap Pom Pom Coasters Made from Upcycled Coffee Sack
/*This post contains affiliate links. This means that if you click through and give the product a whirl, I get a tiny fee for spreading the news at no extra cost to you.
Remember that time I upcycled a burlap coffee sack into a coffee-themed Thanksgiving tablescape? And then we took that same coffee sack and turned it into a geometric miniature Christmas tree skirt? I bet you thought we were done with coffee sacks, but if you haven’t caught on yet, I can be really intense when it comes to not wasting things.

(Ahem, sour orange Waste Not Want Not Challenge, I’m looking at you.)
Today we’re taking the scraps from that last project and making these adorable pom pom coasters.
I love pom poms! They’re bright, they’re zany, they add just the right but of playfulness to otherwise ordinary objects, and these DIY burlap pom pom coasters make great Christmas or hostess gifts.
And if you drink and or spill nearly as much coffee as I do (it’s not living until your hands are shaking from caffeine, y’all), coasters are a necessity.


DIY Burlap Pom Pom Coasters Made from Upcycled Coffee Sack
What You’ll Need:
Burlap coffee sack
Dressmakers scissors
Fabric glue or super glue
Cardstock
Sharpie
Embroidery needle
Iron and ironing board


Instructions:
Use your fabric scissors to snip down the side seams of your coffee bag to form one long rectangle of fabric. Shake out any unroasted beans lurking in the corners.
Set the iron to high and iron out any wrinkles in your burlap.
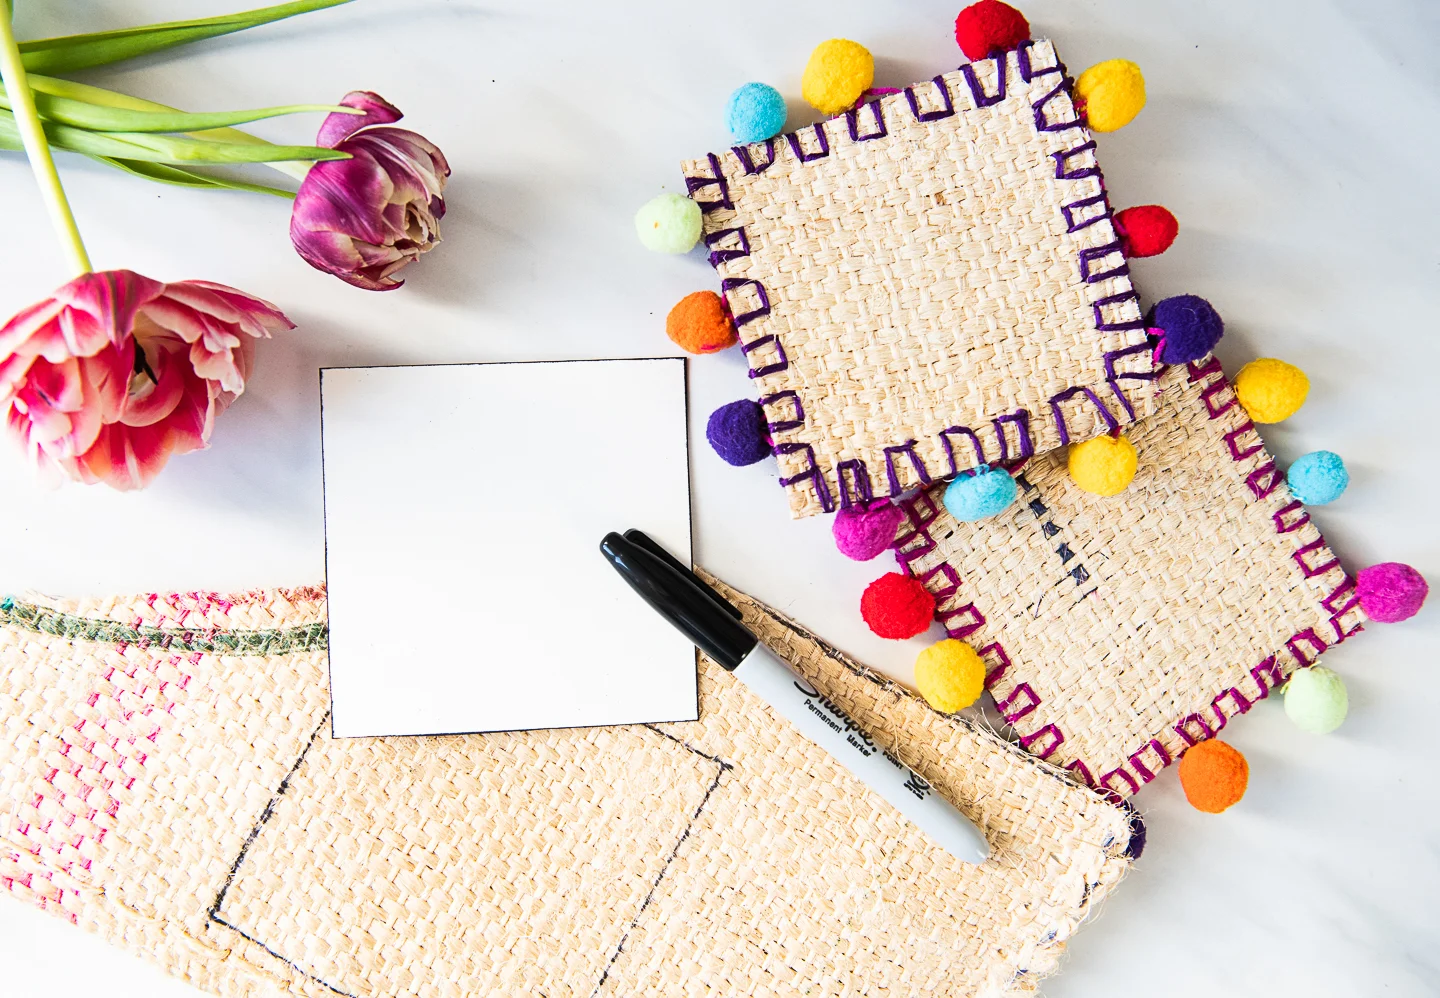
Trace a square the desired size of your coasters onto your cardstock and cut out.
Using your cardstock square as a pattern, trace 12 squares on the backside of your burlap sack (or the “unpretty” side), keeping in mind that making cuts against the existing weave of the fabric (think diagonal) may take more time to seal off fraying.
Cut out your burlap squares, keeping your cuts to the inside of the Sharpie marks.
Take your fabric glue or super glue and run along the edges on the undersides of your squares to prevent fraying. Let dry. (Note: Super glue will dry almost instantly but will create a firm and almost crunchy texture along the edges of your coasters. Fabric glue will take a bit longer to dry but will create a permanent but flexible hold. Both will work well.)
Cut your pom pom ribbon into desired lengths and dab fabric glue or super glue along your cuts to seal off fraying. Once the pom pom ribbon segments have dried, arrange and pin on the inside of one piece of your burlap coaster. Sandwich the ribbon side with your second burlap square.
Thread your embroidery needle and knot. Starting from the inside of your coaster, sew your coasters together as desired and tie off. I did this little geometric stitch to continue to play with shapes.
Once you’ve finished your set of six coasters, skim your scissors along the flat part of your coasters and trim off any stray fibers. This will reduce the rustic look and give them a more polished aesthetic.
Pour yourself a cup of coffee, kick back, and enjoy the morning!


