
3 DIY Paper Crowns from Upcycled Wrapping Paper
/*This post contains affiliate links. This means that if you click through and give the product a whirl, I get a tiny fee for spreading the news at no extra cost to you.
Raise your hand if your mother and/or grandmother have a habit of squirrelling away pretty wrapping paper. Every year as we open presents, someone inevitably says, “Oh, this paper is just to pretty to throw away!” After years of wondering what actually becomes of it, my mom trotted out some of my old wrapping paper - even before I decided to go zero waste, I’ve been making my own wrapping paper in various ways and forms - which both made me wonder what ELSE she’s been ferreting away and then gave me several crafting ideas.

Why crafting with old wrapping paper, you ask? Because Americans produce 25% more trash between Thanksgiving and New Years. Because most wrapping paper isn’t recyclable because of the tape, poor fiber quality, and plastic additives (for luster, glitter, or metallic prints).
And so, dear readers, I am turning into my mother.
I greedily snatched up a ridiculous amount of our wrapping paper waste this year and then realized, “Oh crap, I now have a small mountain of old wrapping paper.”
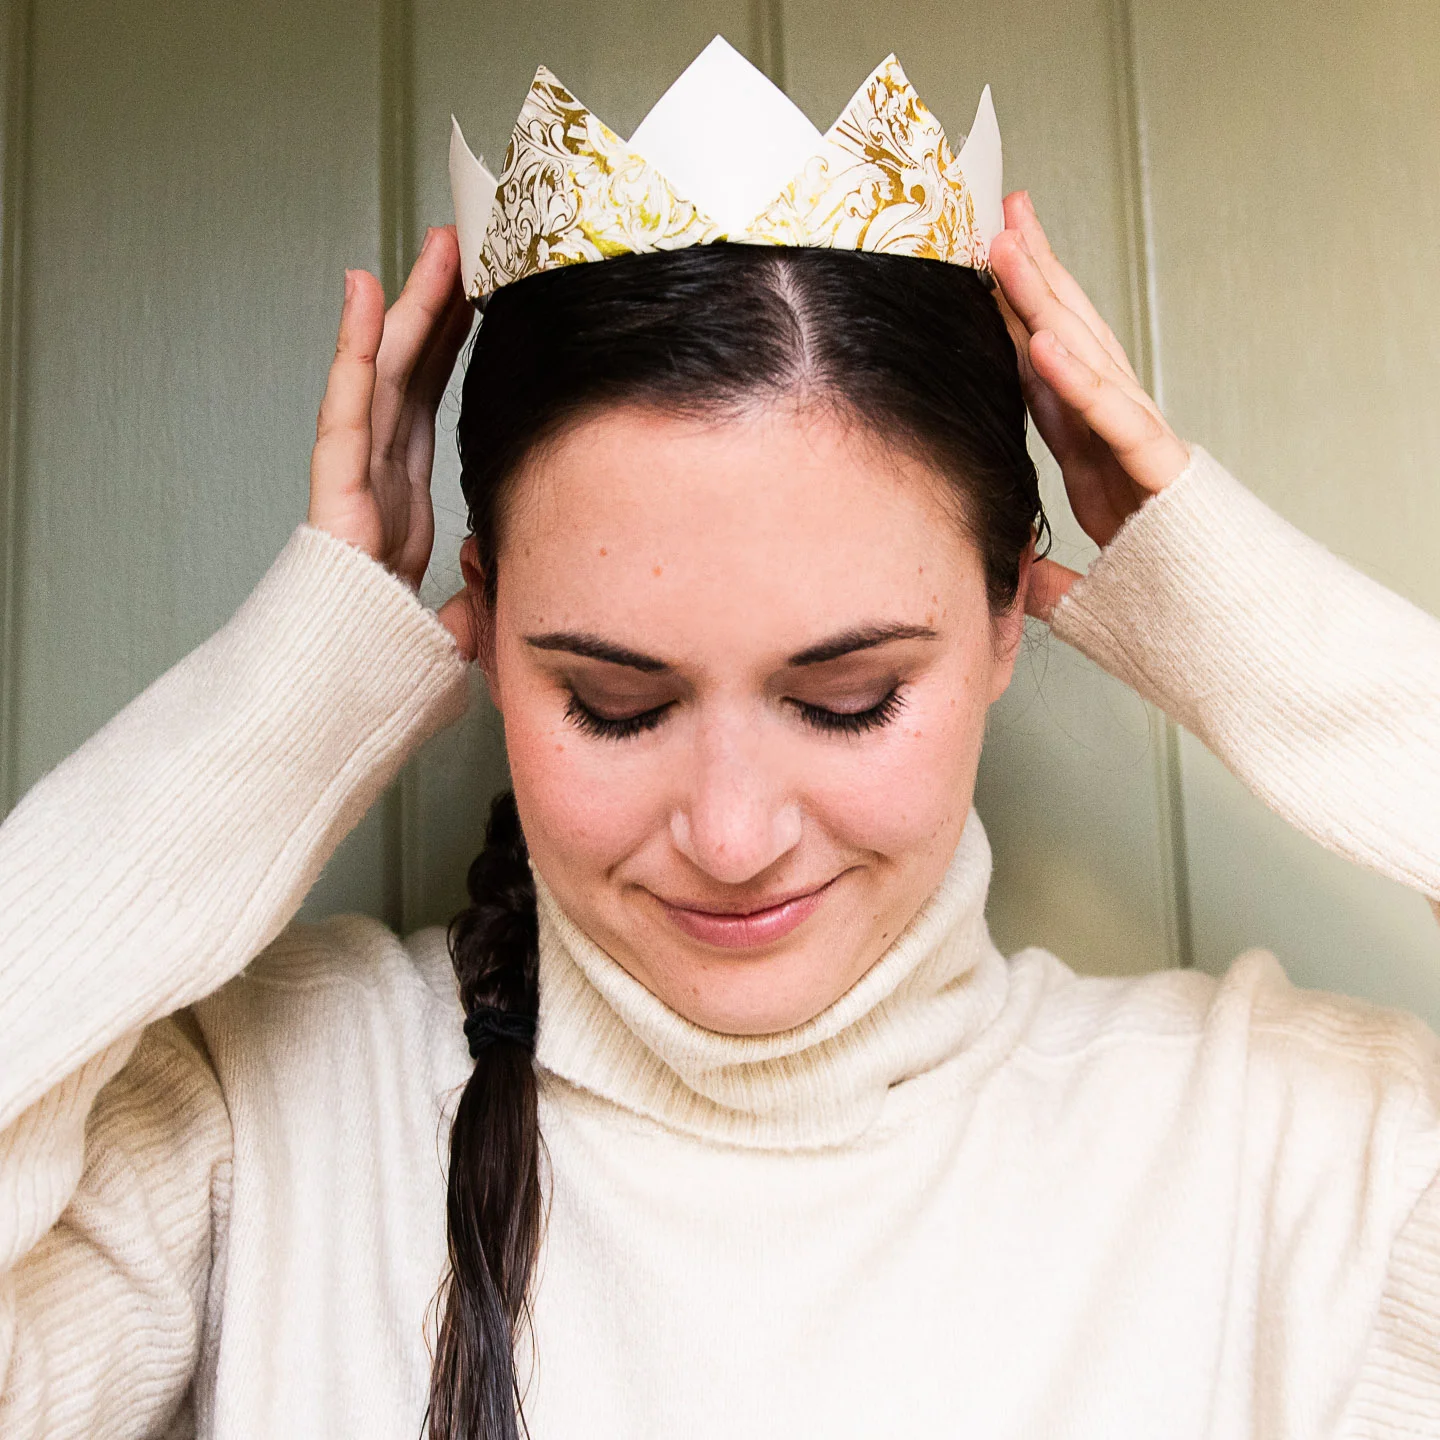
How’s a girl to creatively upcycle tons of wrapping paper? How about making pretty DIY paper crowns for New Years Eve with her 10-year-old niece?! We actually did this all on Christmas afternoon and our whole family each wore a crown for Christmas dinner. It added such a fun and playful aspect to our holiday, we may have to turn this into a tradition!
Scroll on down for 3 ways to upcycle your wrapping paper into pretty paper crowns - it’s an eco-friendly upcycle and will save you money on NYE favors, which will just end up in the trash anyway. Also, they’re ridiculously fun.
I know that I, for one, look much better in a crown.
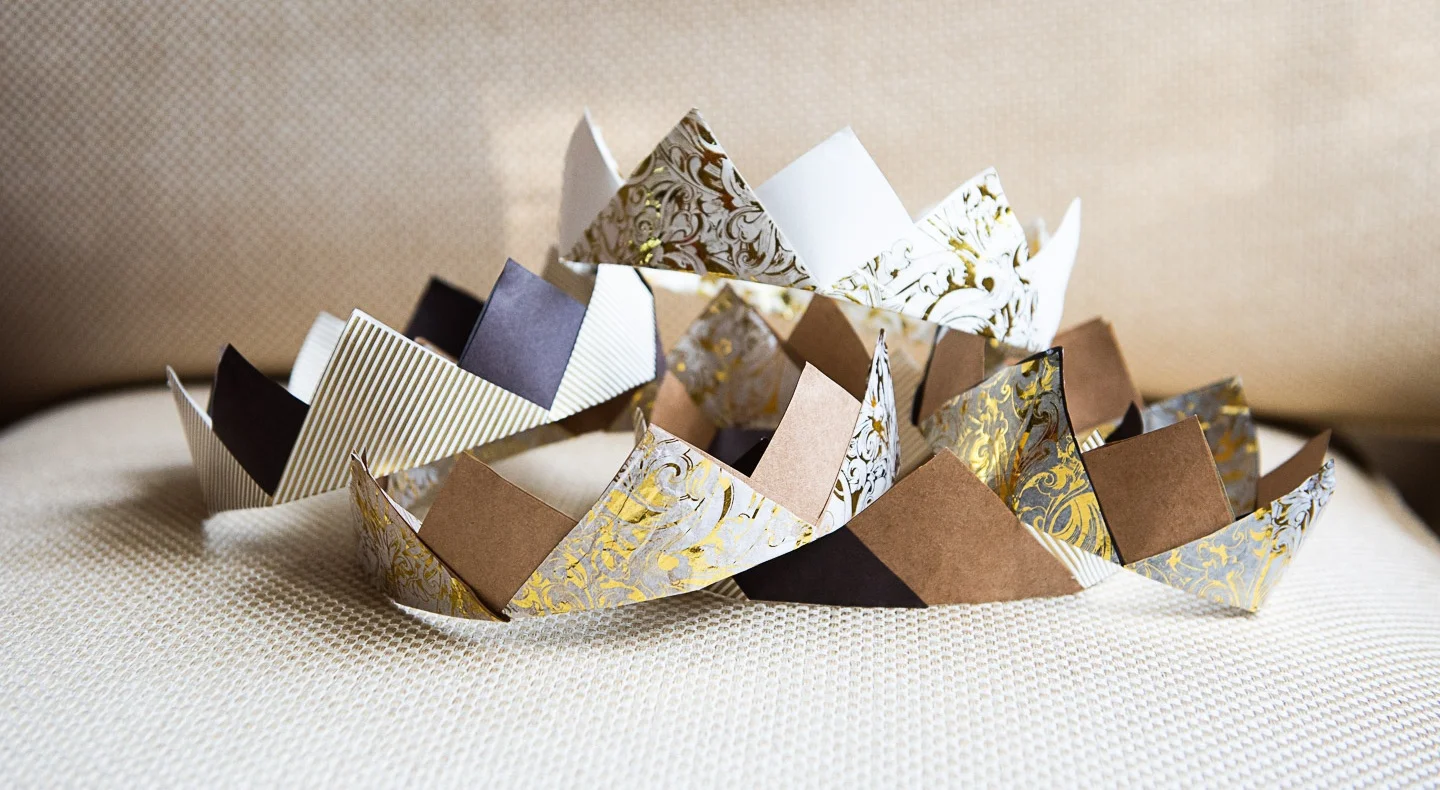
DIY Paper Crowns from Upcycled Wrapping Paper
What You’ll Need:
Pretty wrapping paper scraps, tissue paper, and or decorative gift bags
Several large sheets of white craft paper (optional)
Cardboard t-shirt box for shape templates
Yard stick or ruler
Clothes pins or chip clips
Old magazines or more wrapping paper to protect your crafting surface of choice

Notes: My niece and I made an assortment of crowns that measured between 18 inches and 23 inches when laid flat out since we were making them for 13 people ranging in age from 4 to 73. If you’re able to measure the crown recipients, awesome. If not, we found most adults selected crowns that measured between 20-22 before we glued the edges together to form circles.

Instructions for Basic DIY Paper Crown from Upcycled Wrapping Paper:
Decide which paper or papers you’d like to use for your crown. Smooth flat (some papers you may be able to iron) your wrapping paper and tissue paper, and cut your gift bags along one corner seam from the top to the bottom of the bag. Cut along the bottom of the bag and discard - this section is too thick and has too many seams to work with. Lay gift bags flat and trim off and discard any handles or tags.
Using your cardboard t-shirt box or the top of a gift box, cut a perfect square to trace as your template (ours were 3 inches by 3 inches).
Flip your paper from your gift bags pretty-side-down and trace your squares., then cut out. Wrapping paper and tissue paper is easier to navigate pretty-side-up so that you can avoid sections with writing or tape. (You will be folding these squares, however, so you can always position any damaged portions to the inside of your crown.) Trace your squares on your wrapping paper and cut out, taking care to keep your cuts to the INSIDE of your tracing marks, so they will not show.
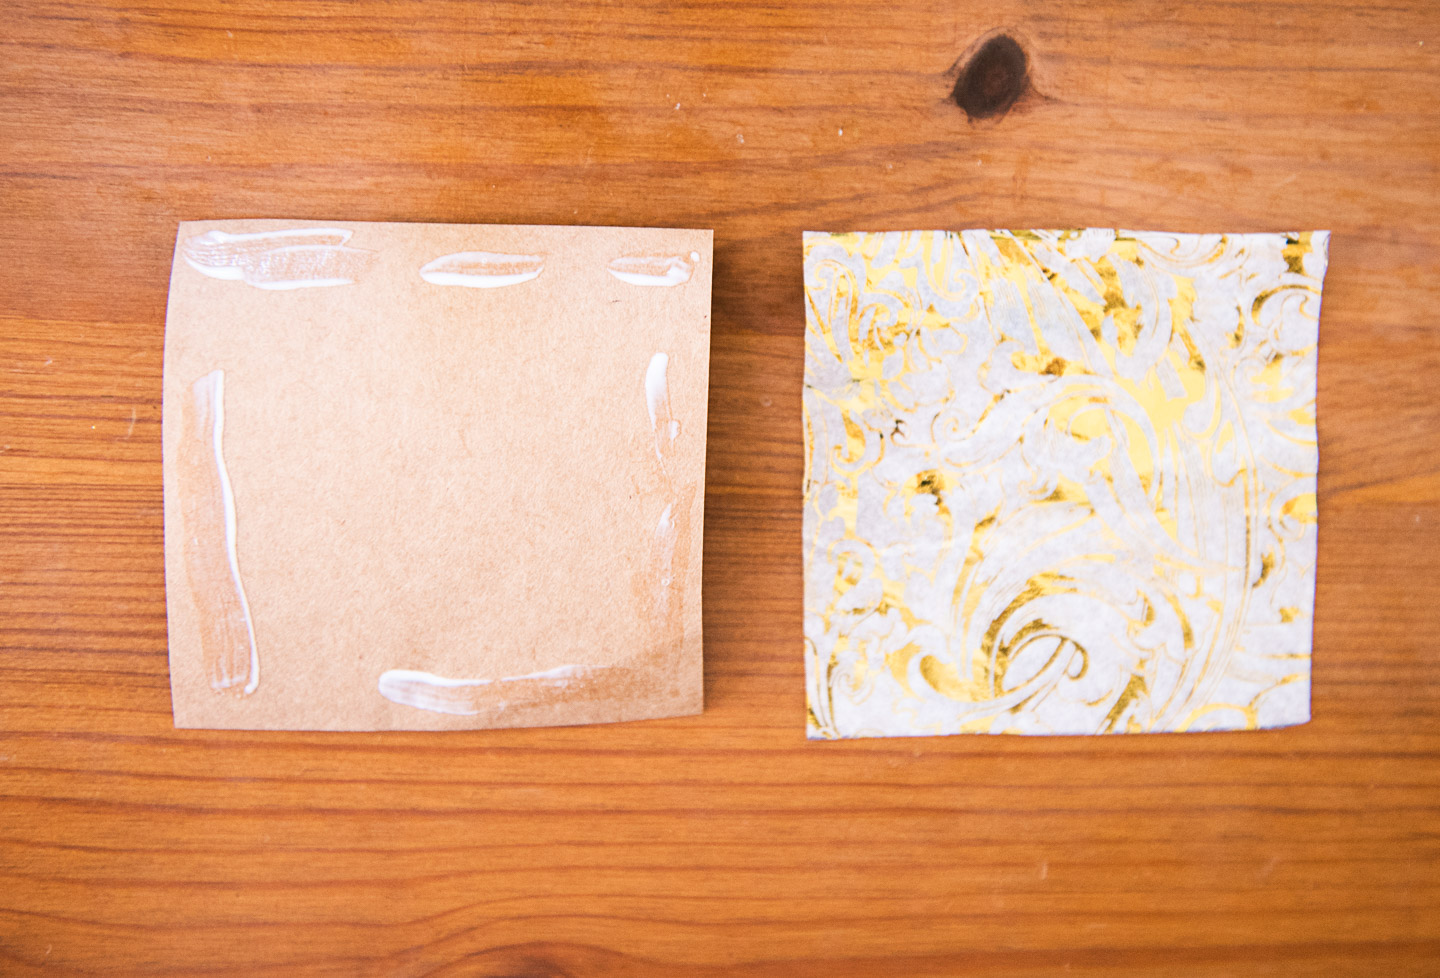
IF YOU ARE USING TISSUE PAPER, you will want to cut an equal number of squares from either brown paper bags or the white craft paper to glue your tissue paper to. Tissue paper by itself is generally too fragile to work with.
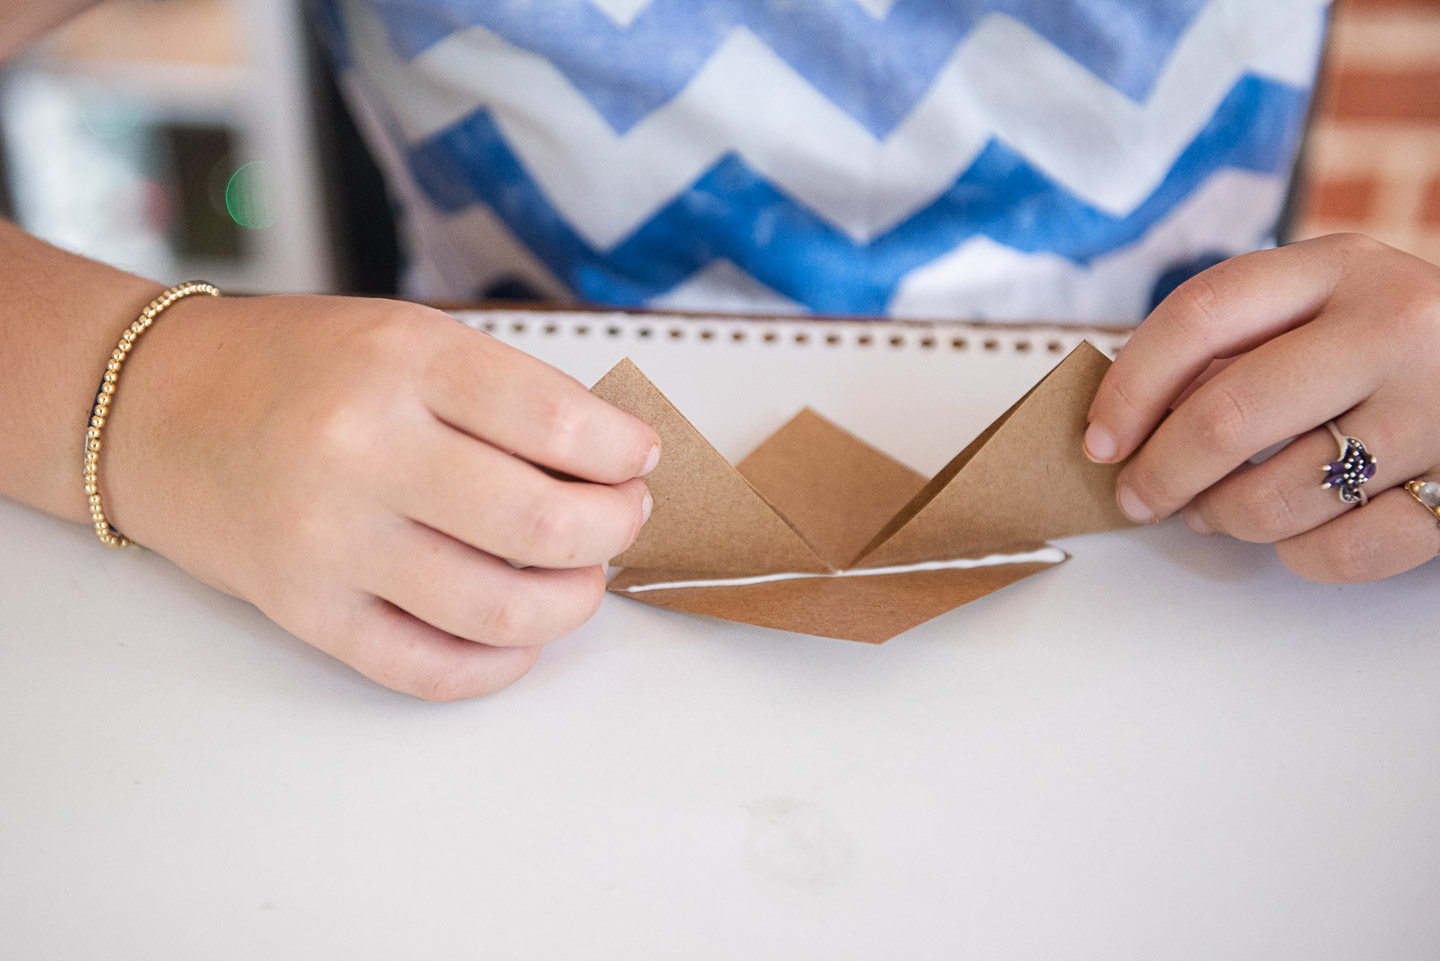
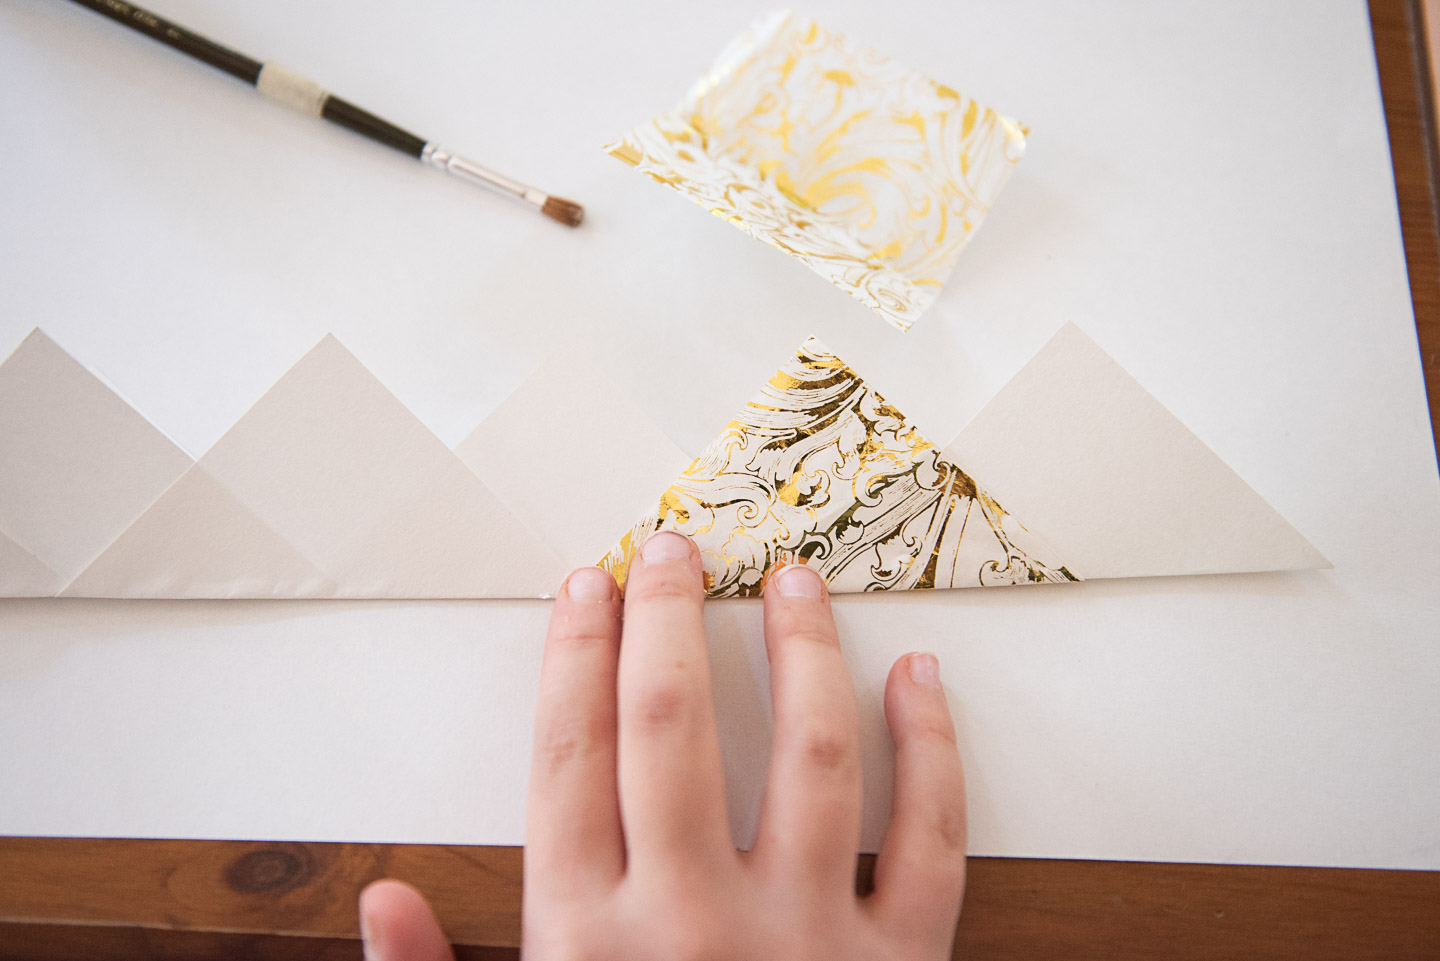
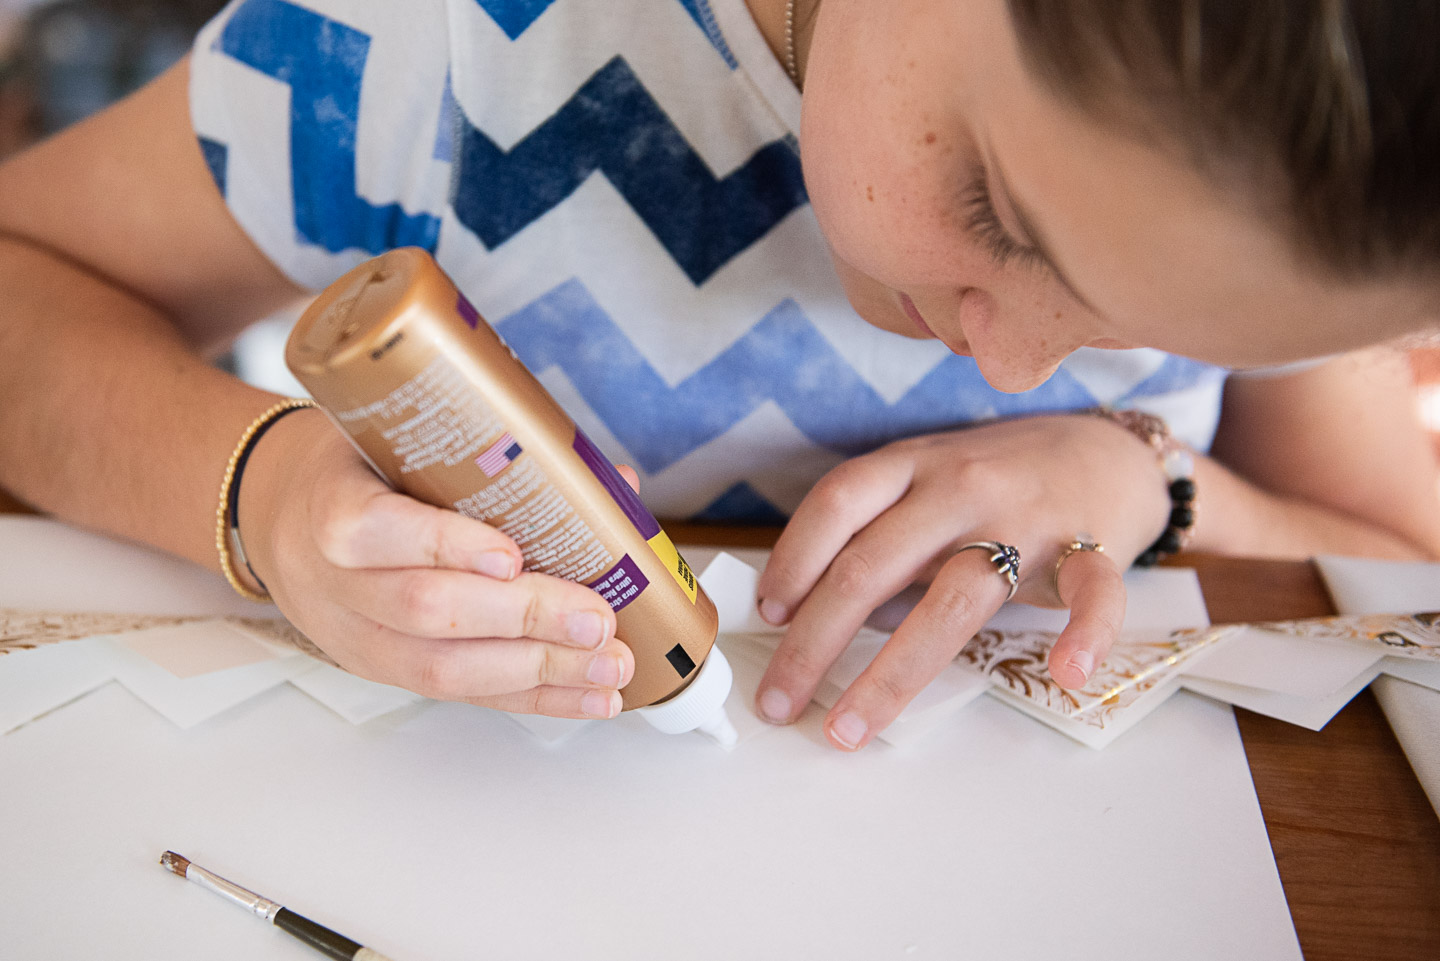
Crisply fold all of your squares into triangles. Select the triangle you’d like to show fully in your finished crown, we shall designate this your “taco” triangle. Squeeze a scant line of glue into the crease of your triangle. Take two additional triangles and nest them inside your taco so that their points just barely meet in the middle (use photo gallery for reference. Press firmly.
The triangle to your far right will now become the left side of your next “taco” filling. Take another triangle and apply glue to the crease and align previous segment with an additional triangle to for a “taco train” as my niece and I called it.
Repeat until desired length is reached.
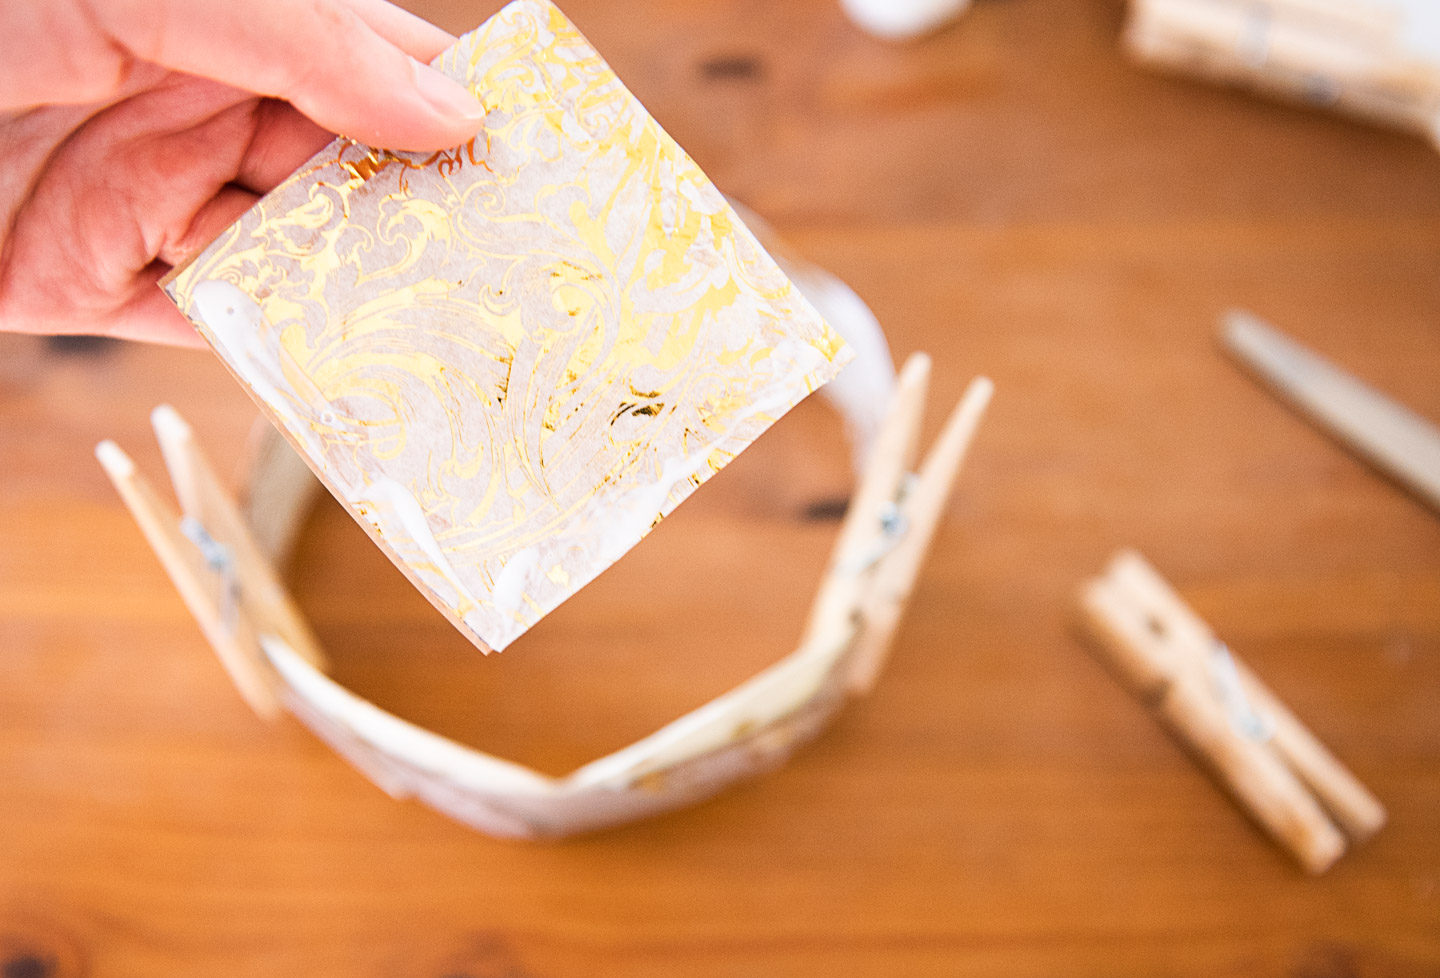
IF YOU ARE USING TISSUE PAPER, apply a very light amount of glue to the top and side points and the crease of your triangles and nest carefully over the “taco” triangles. Smooth gently.
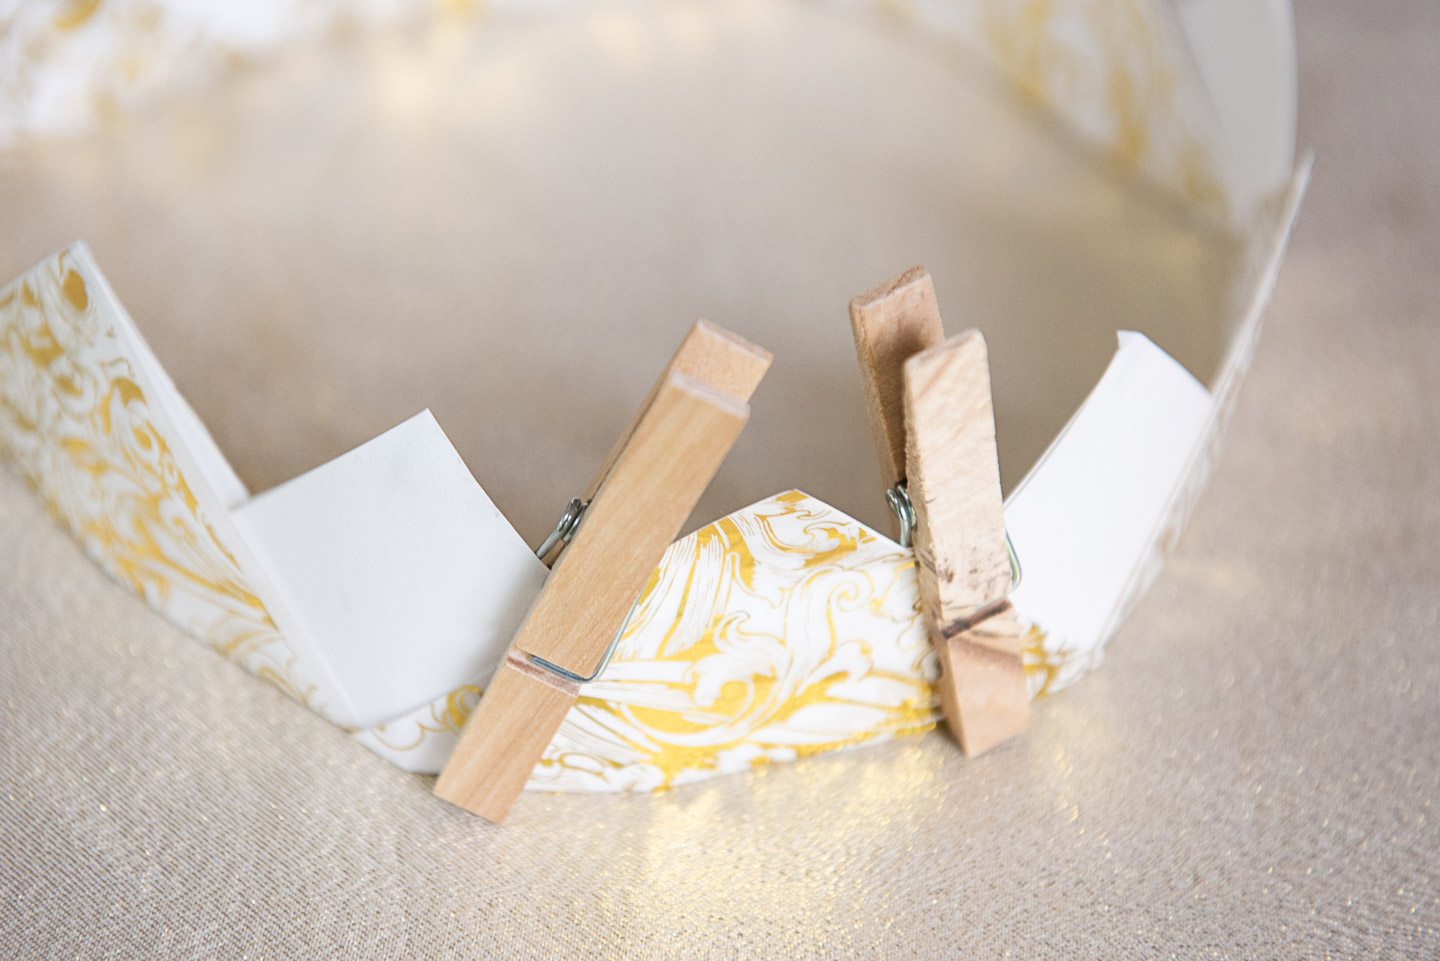
Once your chain of triangles is assembled, apply small dabs of glue to your top triangle points and weight down if needed to adhere the front and back parts of your crown points together. Once all your glue is set (does not need to be fully dry), nest your final end point inside your other end point using adhesive. Secure with a clothespin until bonded, then gently roll between your hands to mold into a circular shape.
Decorate your crowns with additional shapes, embellishment, or tissue paper leaves and flowers as desired.

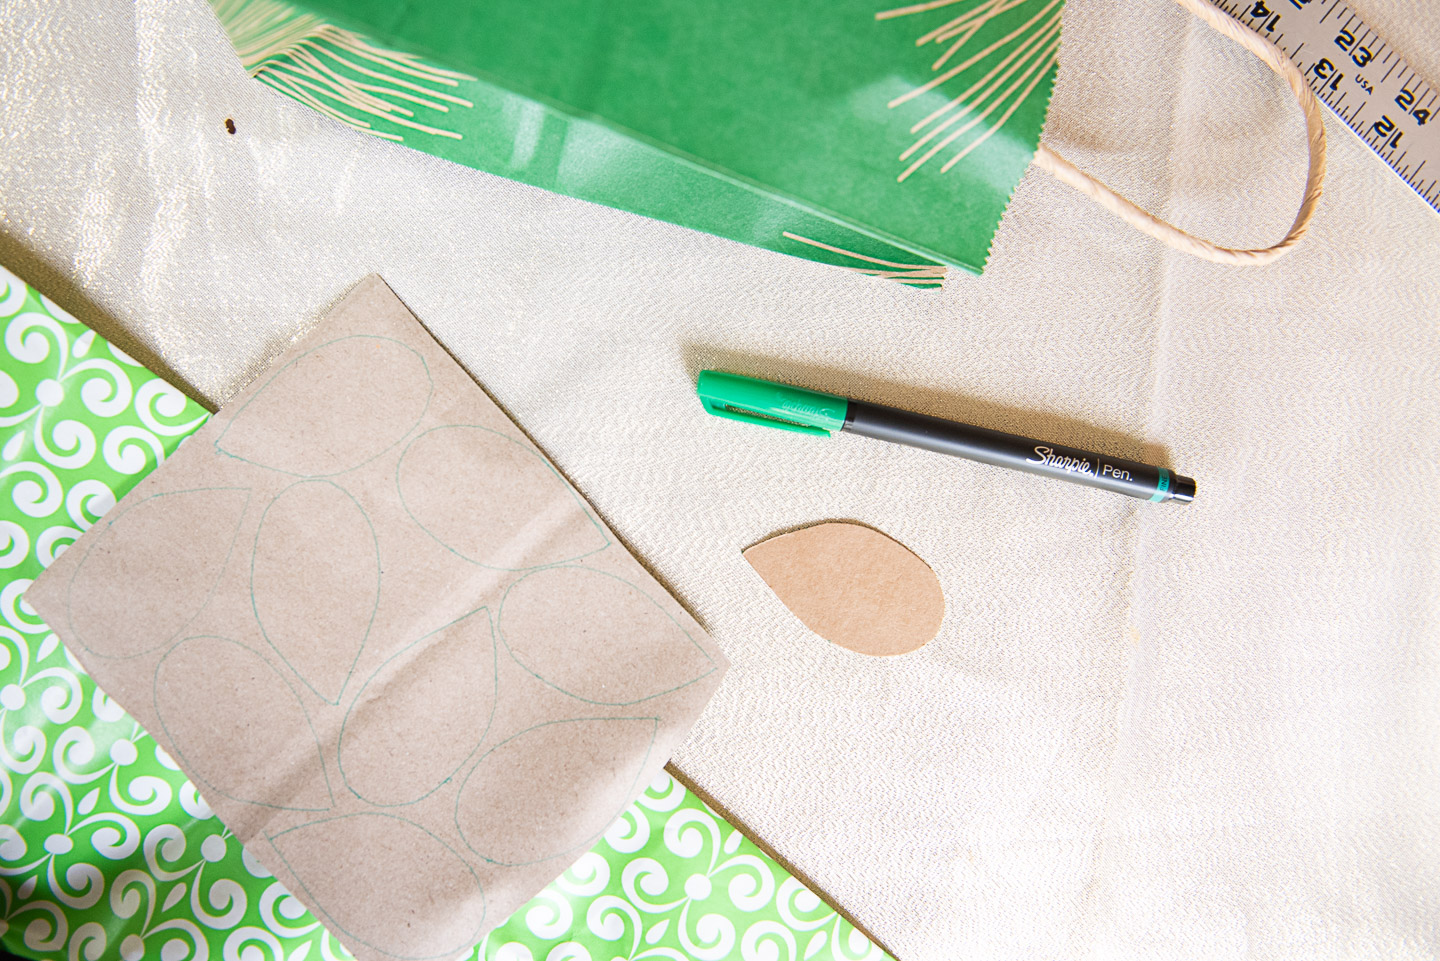
Instructions for Leafy DIY Paper Crown from Upcycled Wrapping Paper:
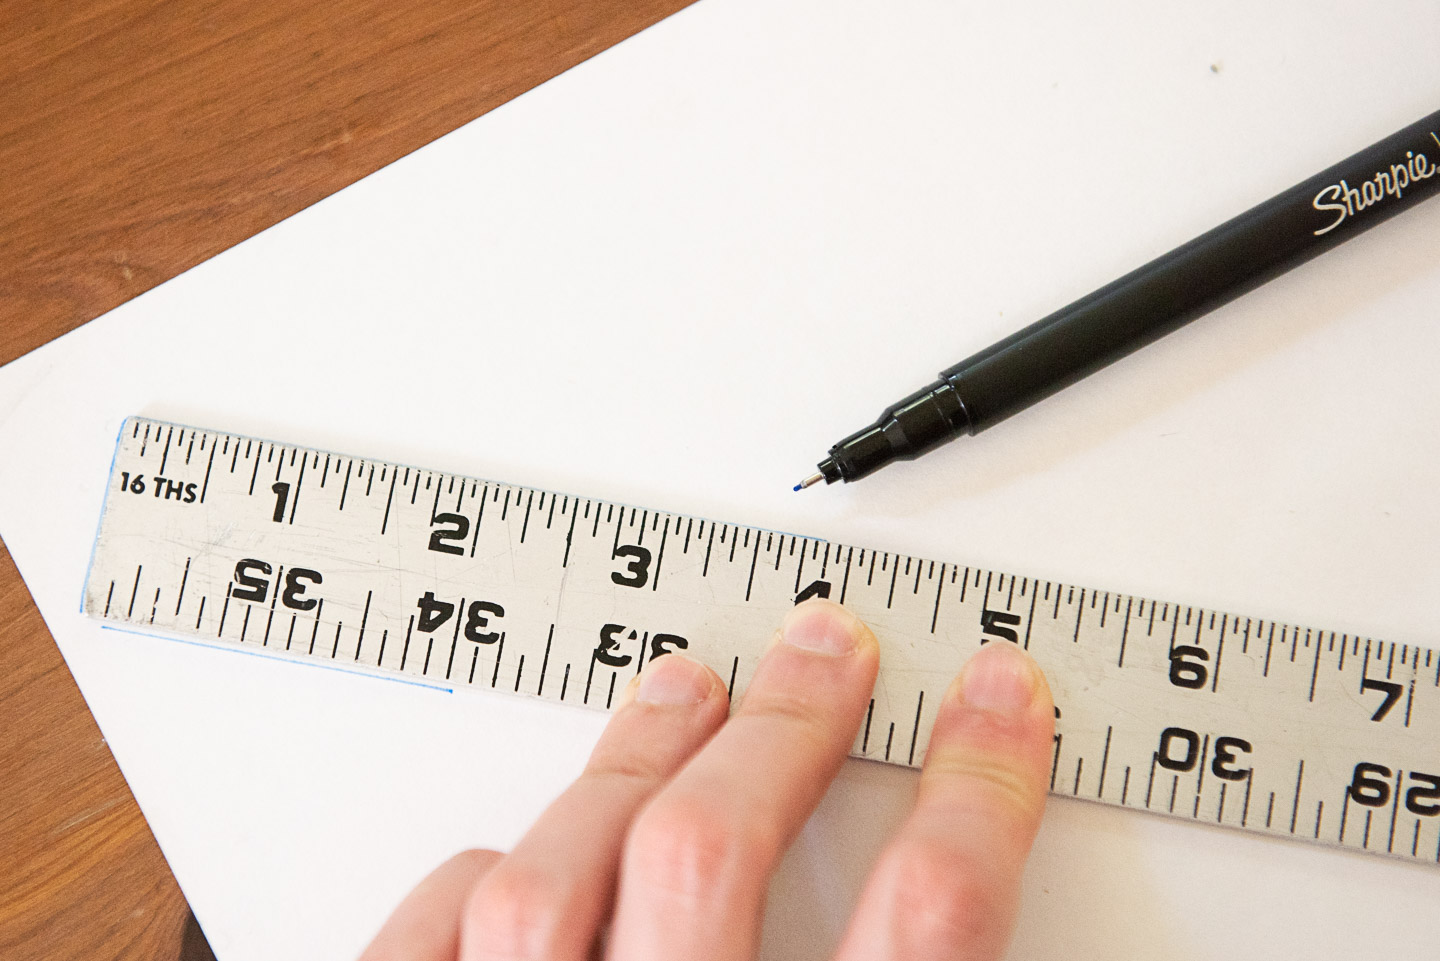
Lay disassembled brown bag or a large sheet of craft paper flat. Measure out a strip of paper that is one inch by your desired length. (Frankly, I just traced my ruler all the way around until I hit the desired length between 18-22 inches. You may get need to use your paper on the diagonal.) Set aside.
Use your t-shirt box or gift box to cut a leaf template. Trace your template onto your decorative shopping bags and wrapping paper, following the advice above regarding tracing and cutting.
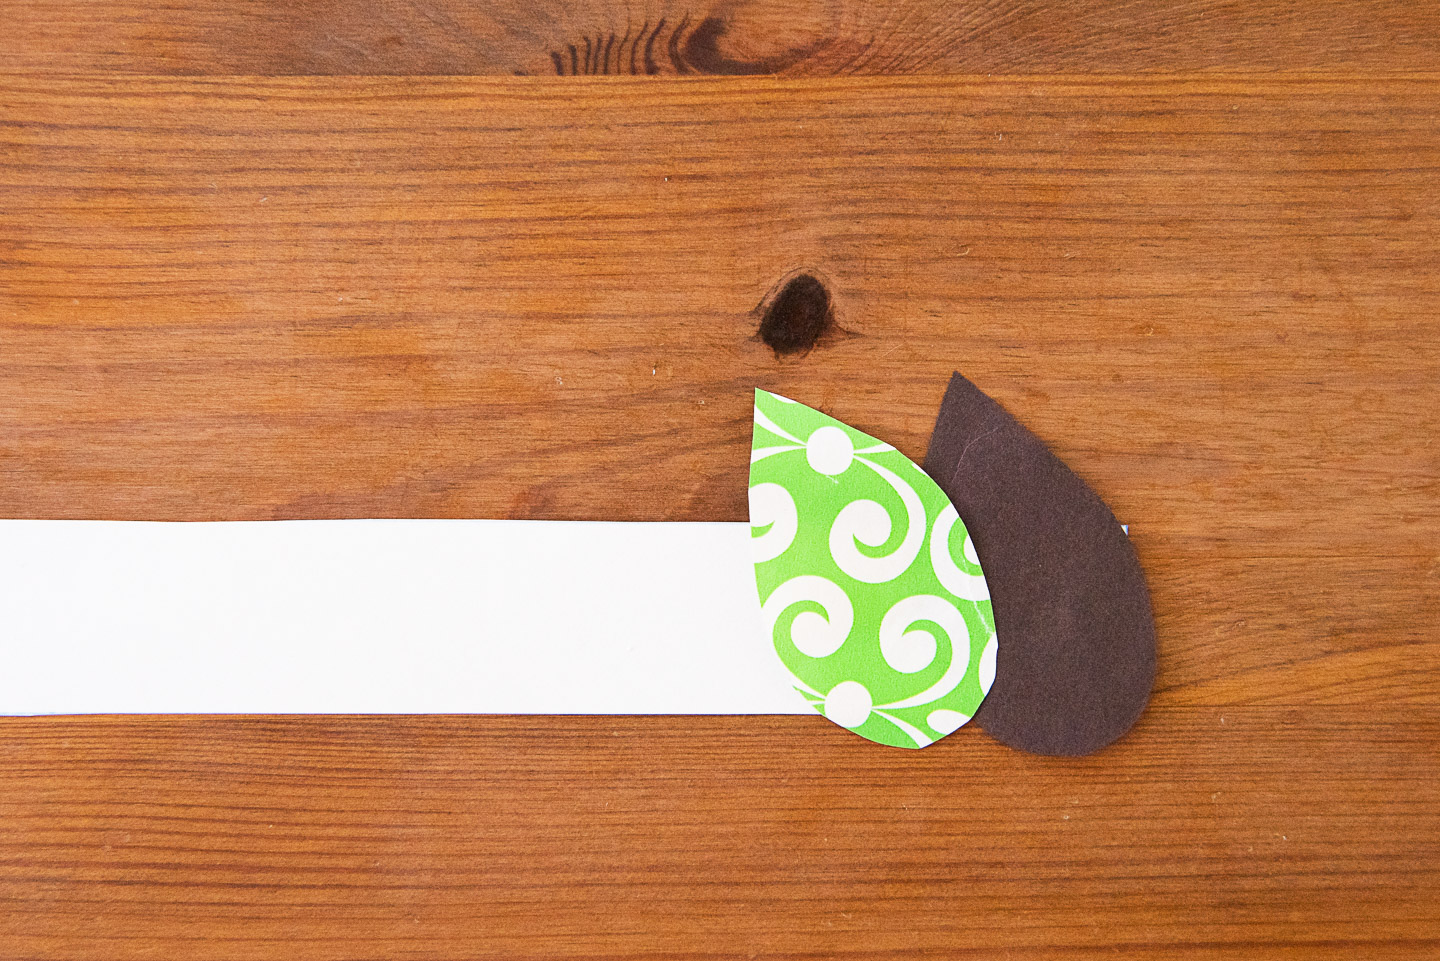
Decide on a pattern for your decorative paper leaves, dab with glue, and smooth onto your paper strip.
Weigh down as needed to ensure smooth drying and adhesion.
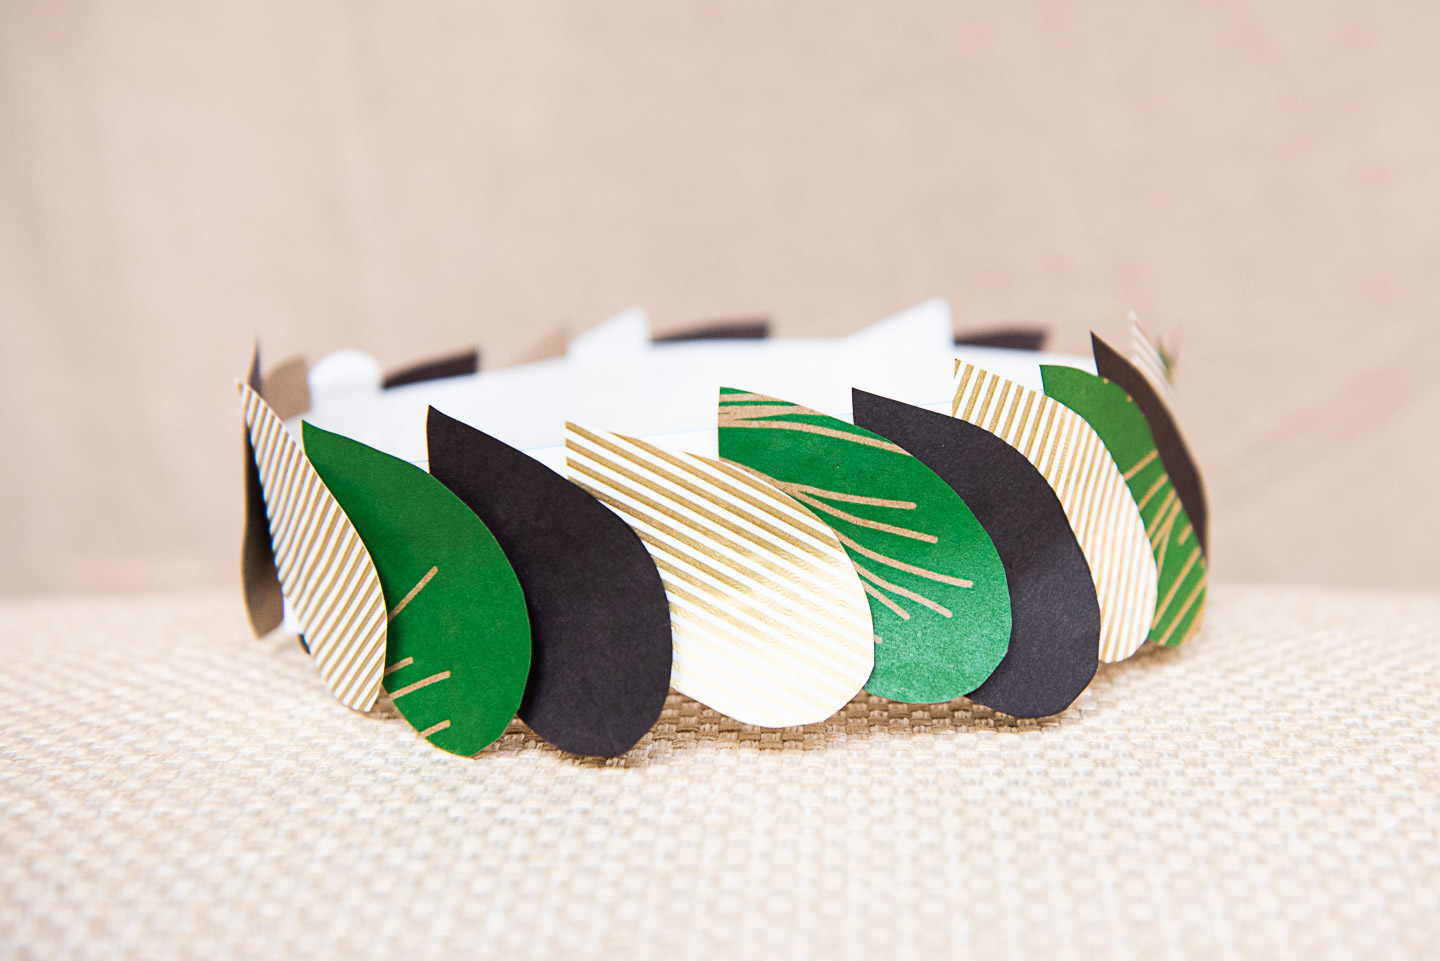
Tuck your end behind your first decorative leaf and bond together with a medium sized dab of glue, add another decorative leaf to conceal the meeting point, if necessary. Secure with a clothespin until dry, then gently roll your crown between your hands to soften into a round shape.
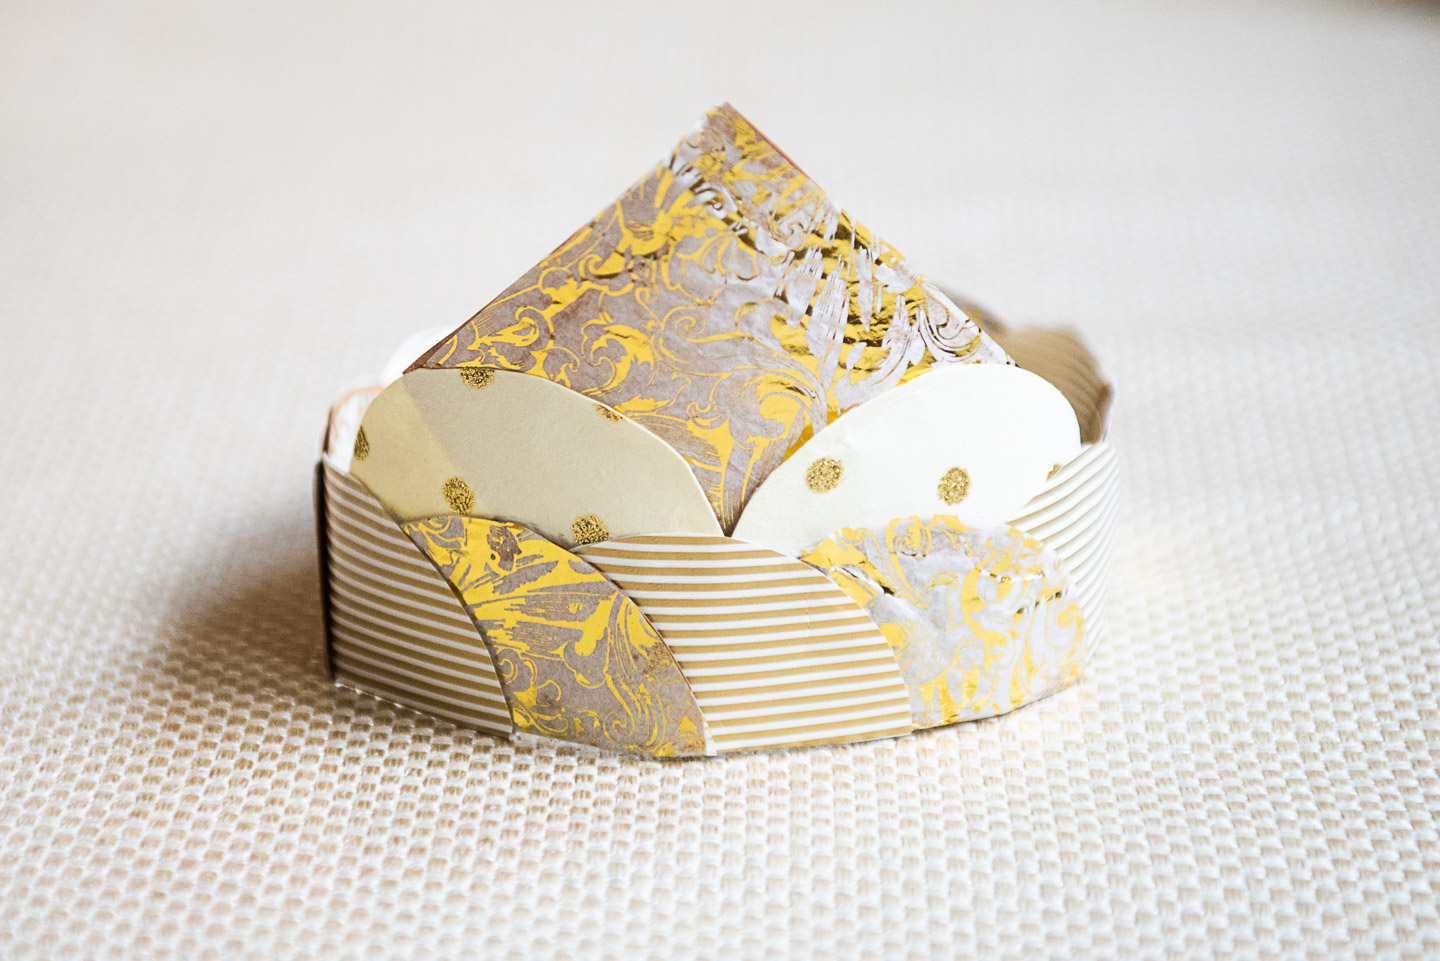

Instructions for Regal DIY Paper Crown from Upcycled Wrapping Paper:
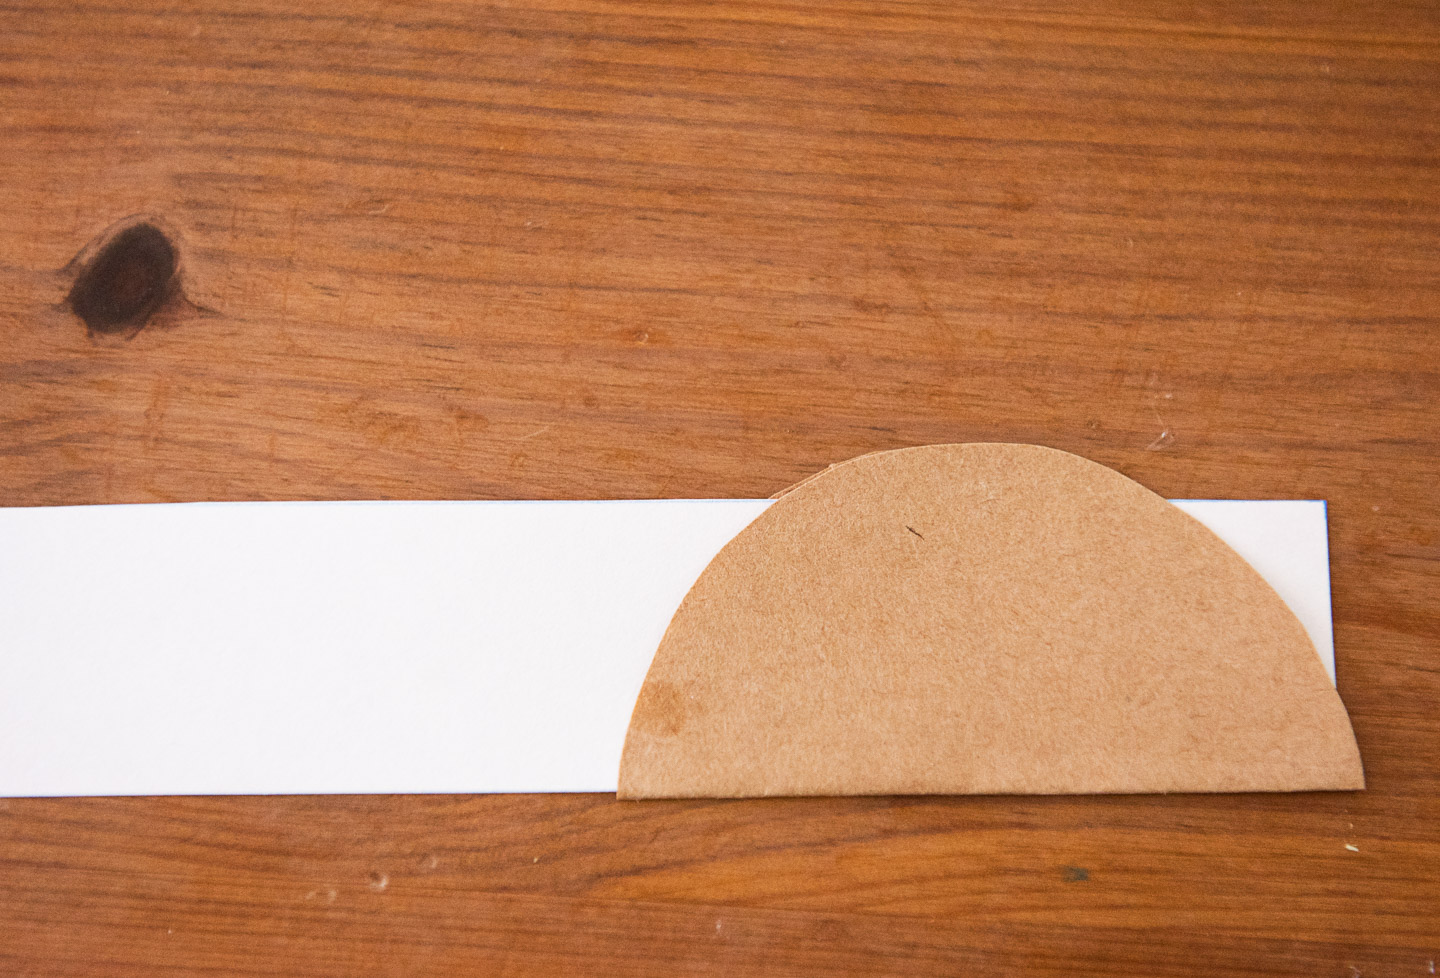
Follow the directions in the Leafy DIY Paper Crown from Upcycled Wrapping Paper above to cut a strip of paper to the desired size to serve as the base for your crown.
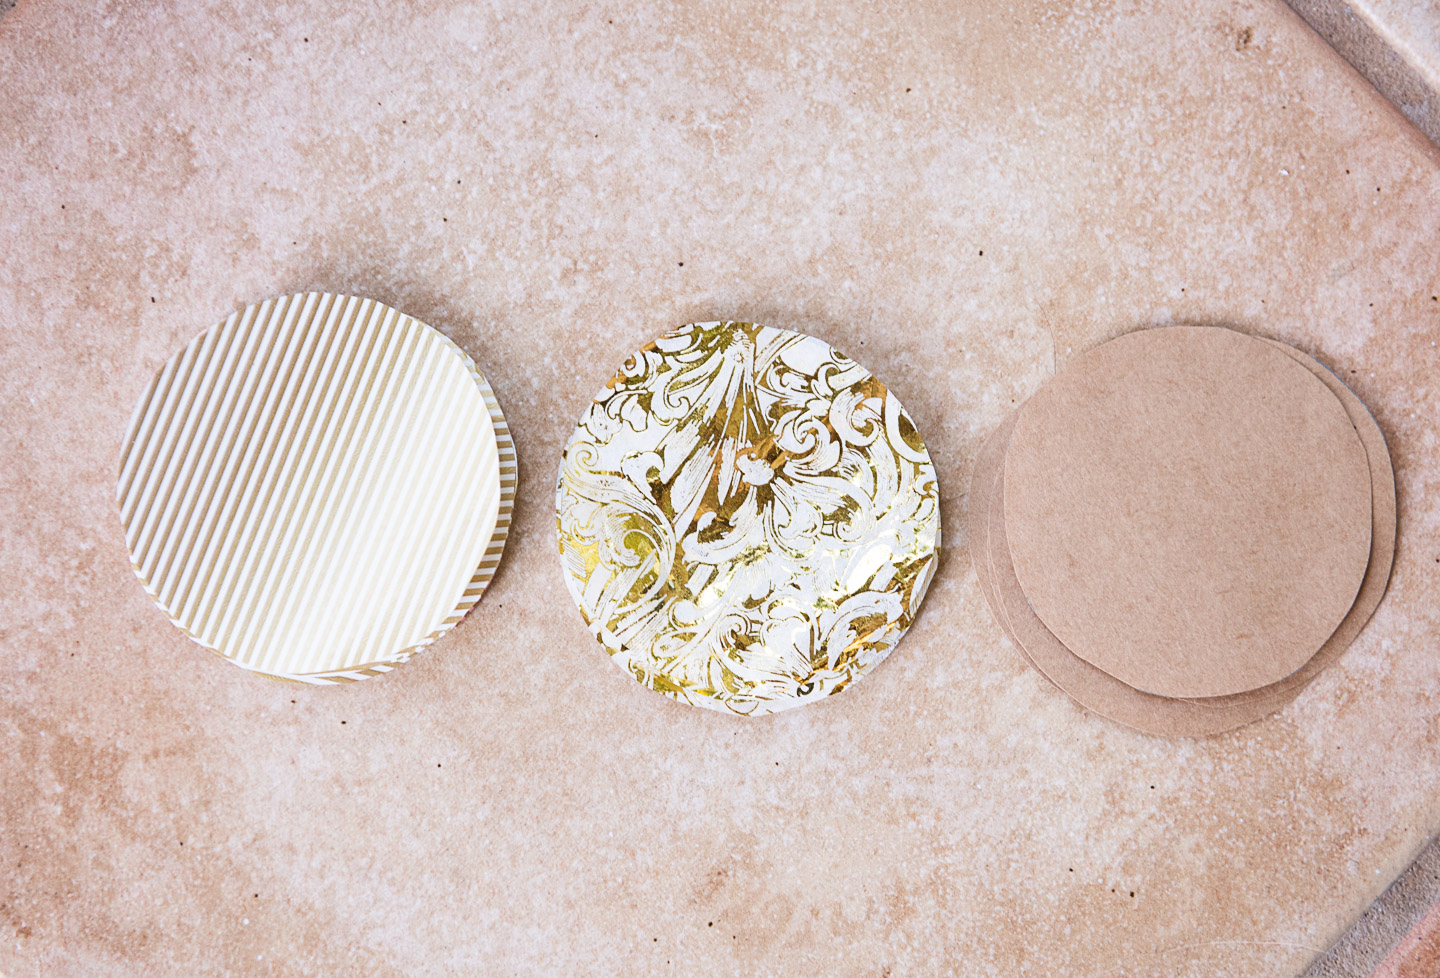
Using a glass or pre-cut circular template from your cardboard t-shirt or jewelry box, trace and cut enough circles to cover your strip of paper.
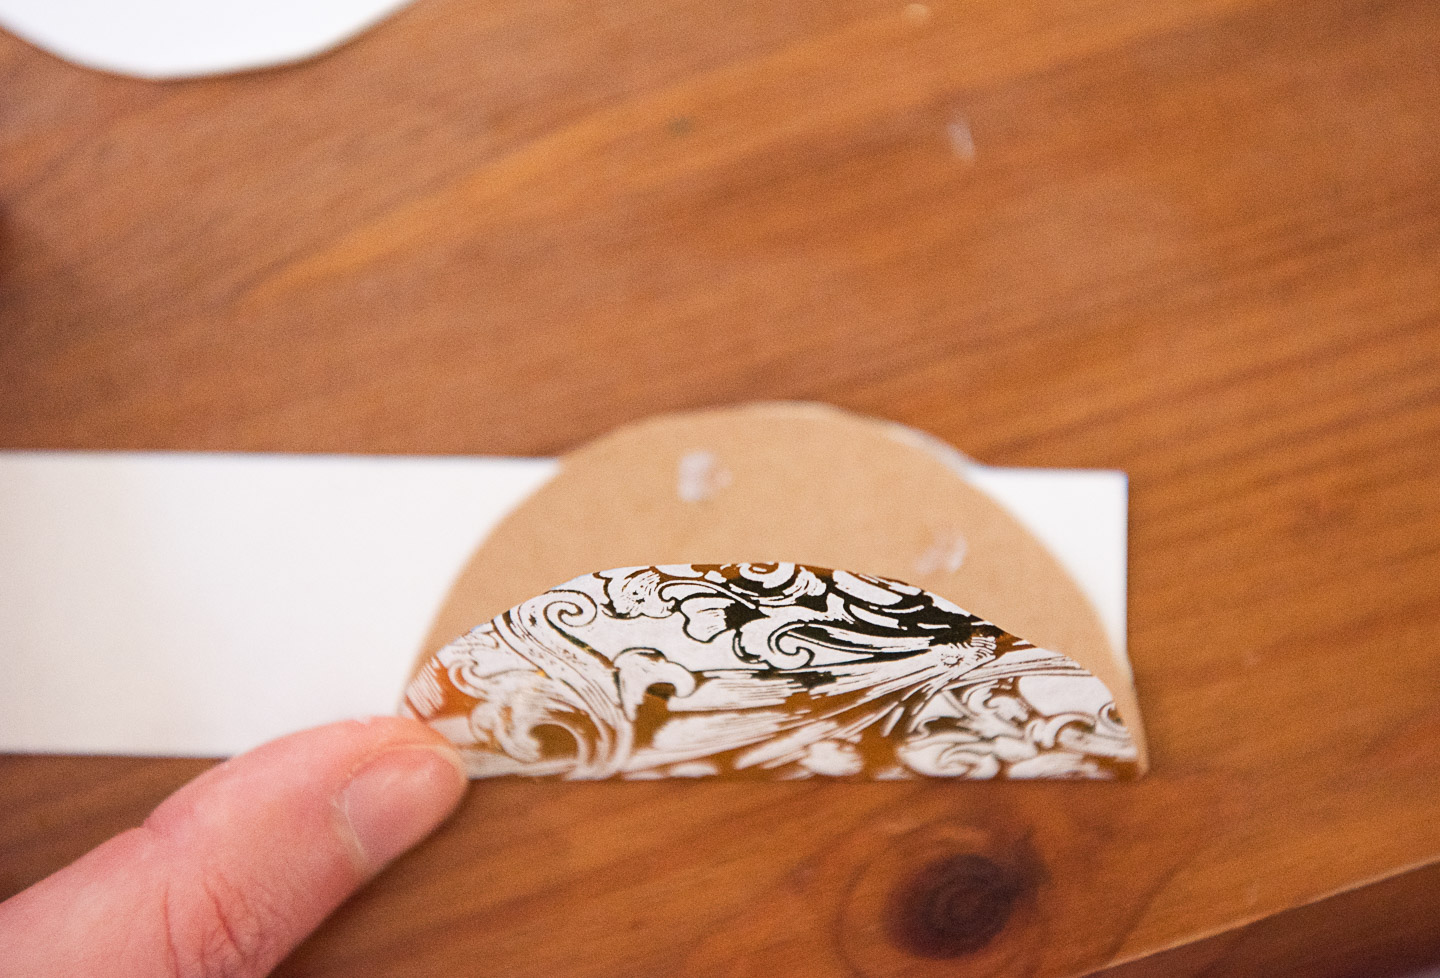
Crisply fold your circles in half, taking care to keep any stripes or patterns facing the desired direction as you fold (this is particularly relevant with stripes).
As with your Basic DIY Paper Crown from Upcycled Wrapping Paper instructions, squeeze a thin line of glue into the crease of your first folded circle and glue around the end of your strip of paper. Apply glue and tissue paper at this step, if needed, since you will be doing a “fish scale” pattern rather than the pattern above.
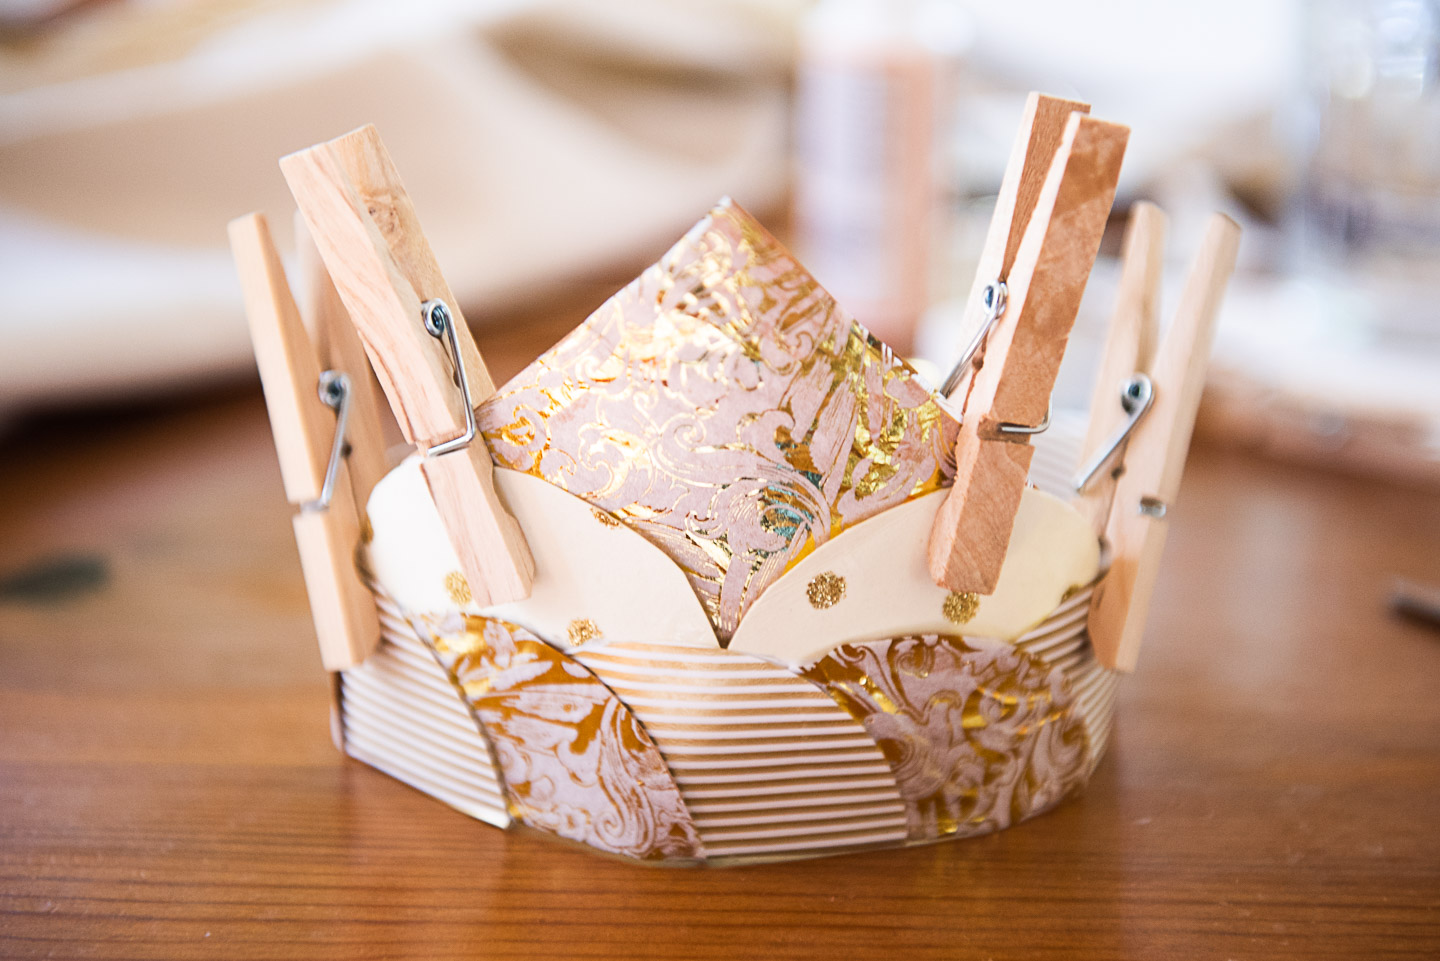
Place another dot of glue at the top curve of your half circle to glue the point of your crown together. Repeat with the next half circle, layering one of the outer edges to overlap the first half circle halfway. Repeat until your crown is covered.
Glue the ends of your crown together and secure with a clothespin, adding an extra piece of decorative paper to cover the meeting point, if necessary.
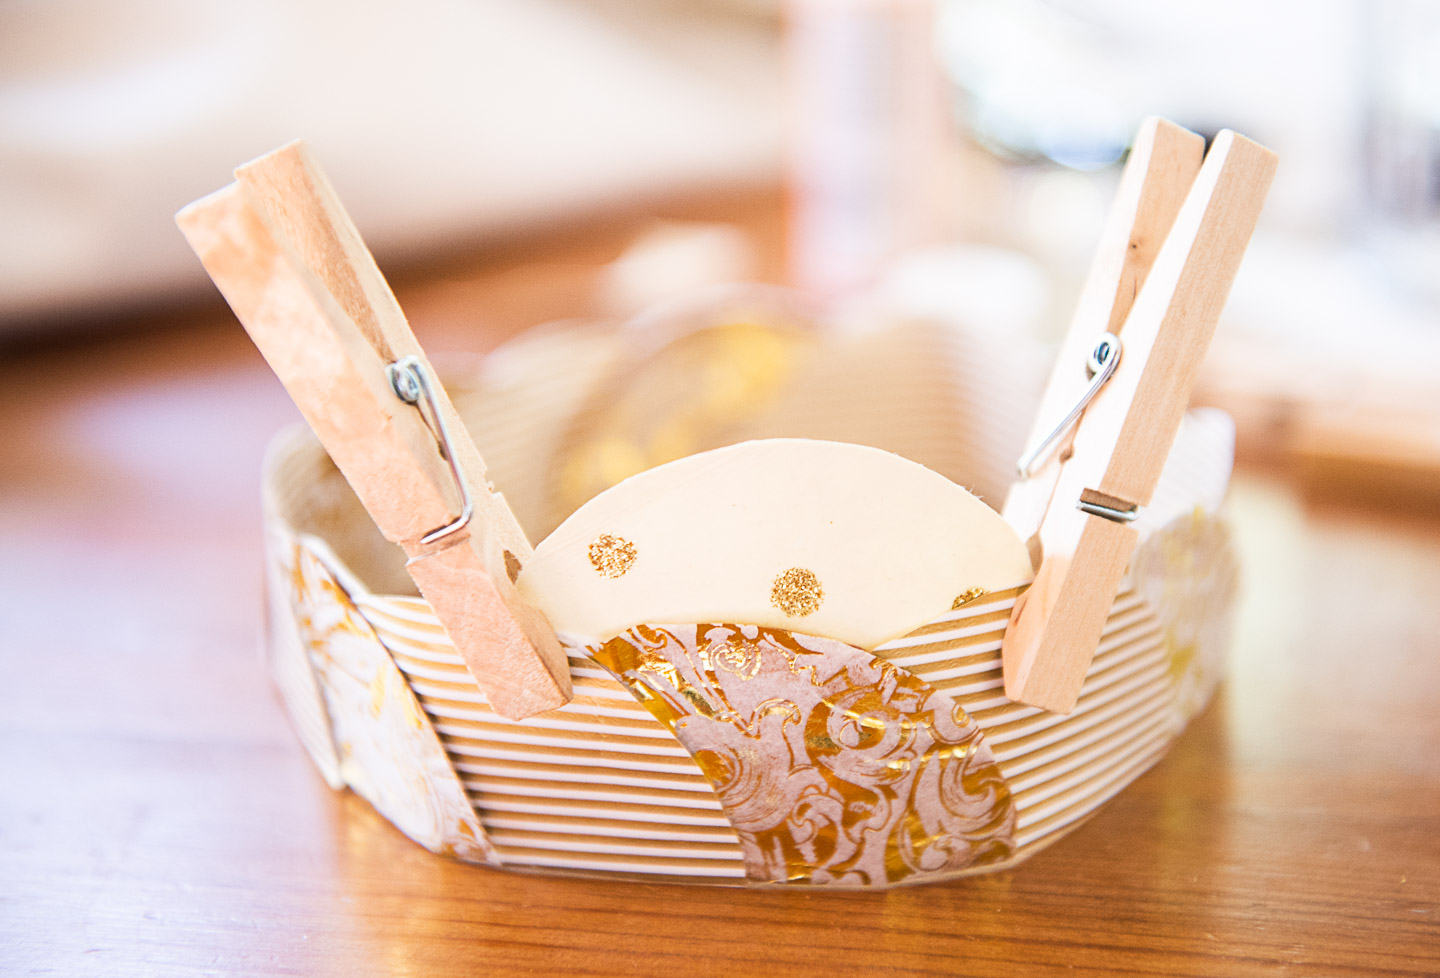
Trace another circle on complementary paper, cut out, fold down the middle crisply, and cut along your fold. Gentle bend paper to approximate the curvature of your crown. Apply a thin line of glue along the “pretty side” of the flat cut of your half circles and place as desired so that the new half circles sit above the existing layers, the glue bonding to the inside curve of your crown. Secure with clothespins until bonded.
Create the point of your crown by tracing a perfect square of the desired size and paper. Cut out your square and apply glue to the bottom two edges of the “pretty side” of your paper and press between the two half circles to form a peak. Secure with a clothespin until dry, then gently roll your crown between your hands to soften into a round shape.
We used up a TON of wrapping paper this way, and it was so much fun. The best part was watching our family and friends try on all our various crowns and decide which had the desired fit and look.

